
Customise your Checkout
Overview
Before you start taking payments, we recommend that you set up your merchant-branded Checkout page by customising the look and feel of the Checkout page. If no theme is set up, a non-branded Checkout page is used as a default.
Customise your Checkout in the dashboard
The Checkout pages can be updated to include your merchant business logo, brand colours, and font.
The Merchant Admin and Merchant Cashier users can create a Checkout theme on the dashboard. Merchant Admin users can also create a theme via the Checkout API.
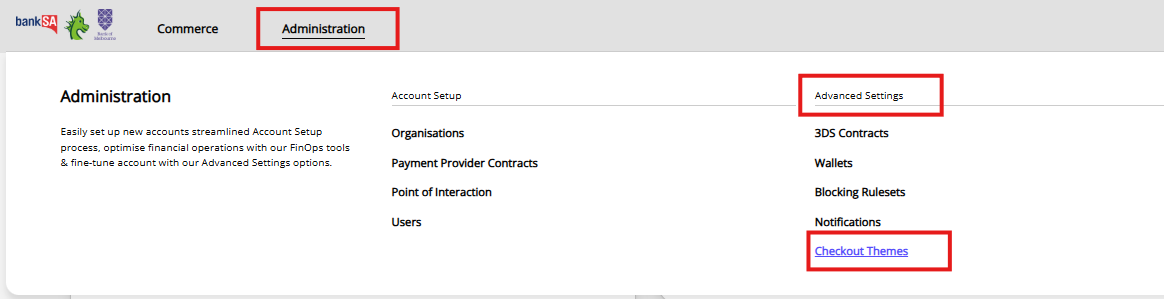
To create a theme in the dashboard, navigate to Administration > Advanced Settings > Checkout Themes.
-
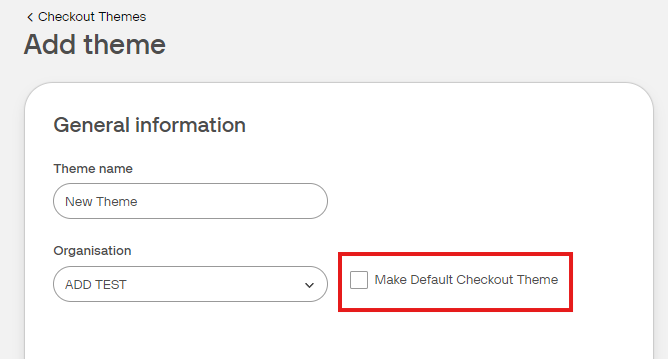
Select Add Theme.
-
Add a Theme Name.
-
Select the sub-organisation to establish your theme. This means that for organisations with multiple sites, the theme must be established at the site (MID) level, not at the organisation level.
-
Select Save Theme.
-
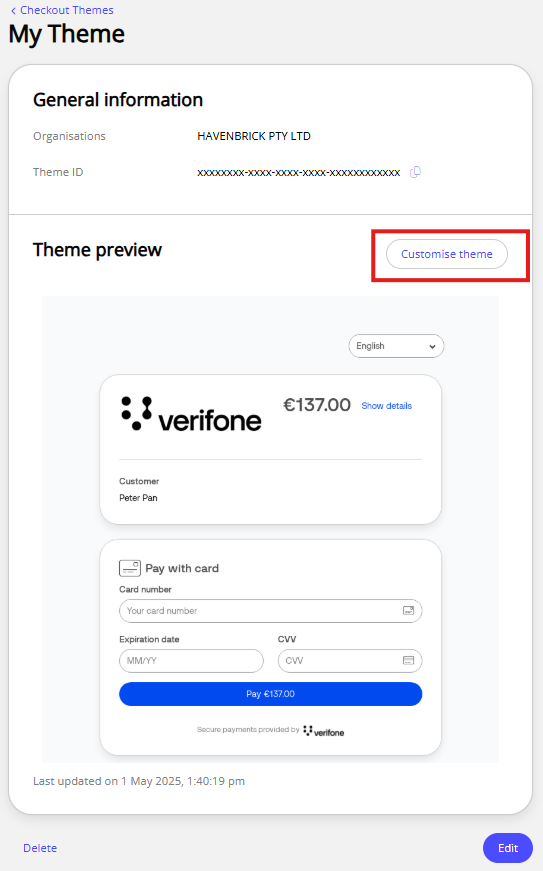
Select Customise Theme.
-
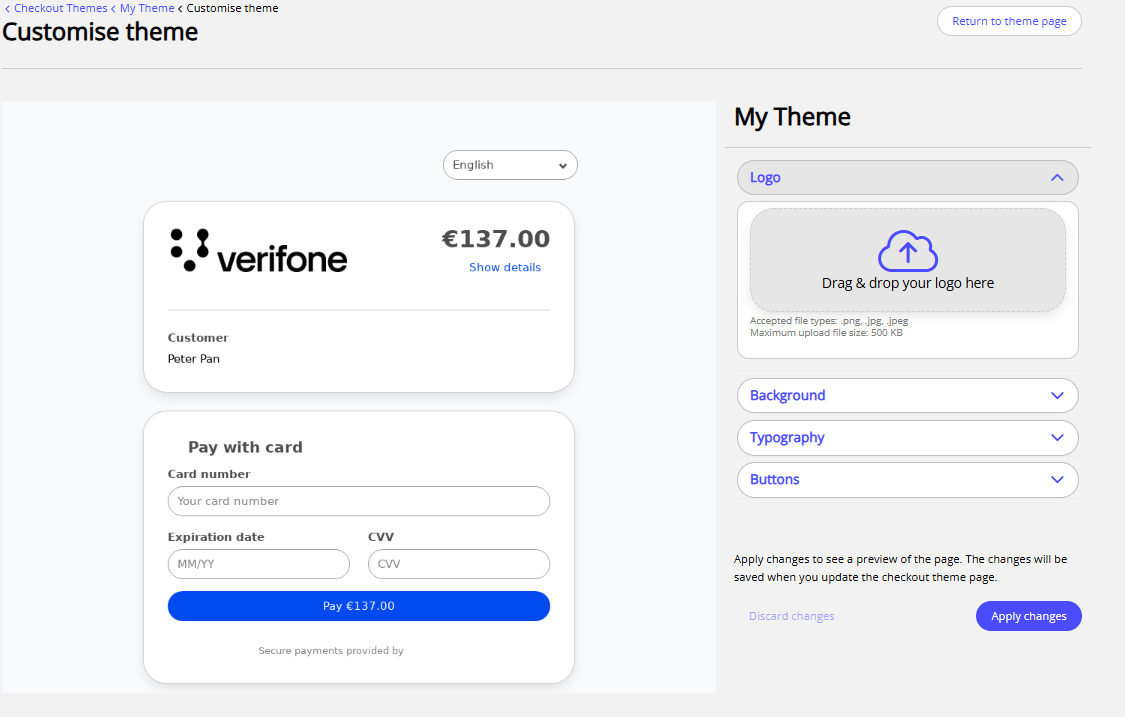
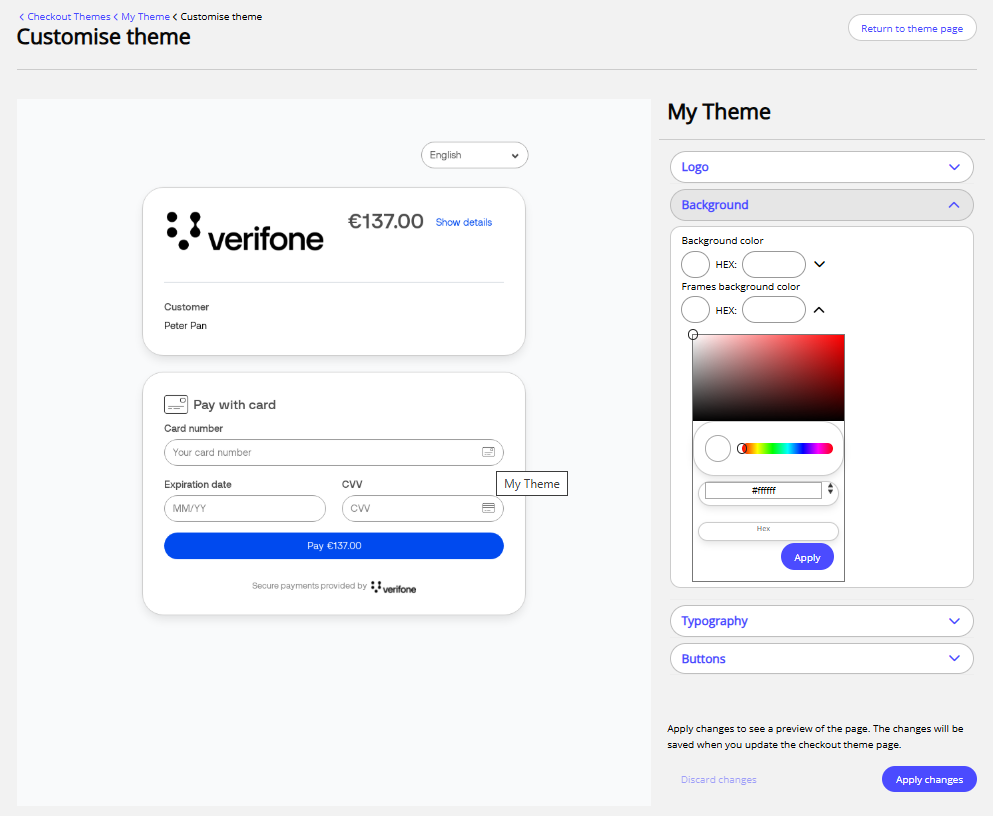
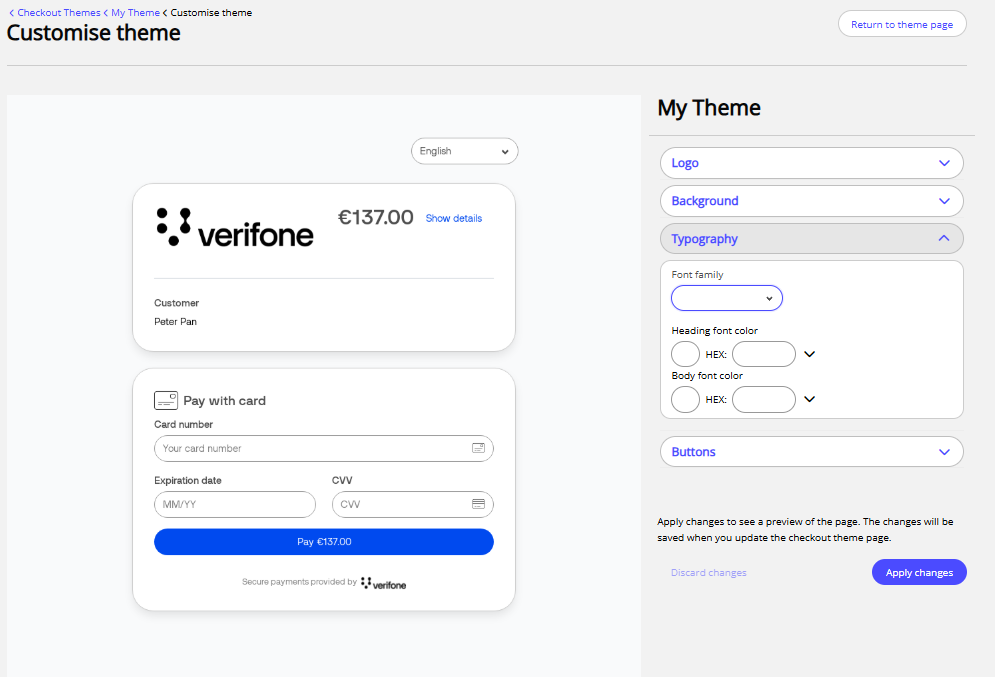
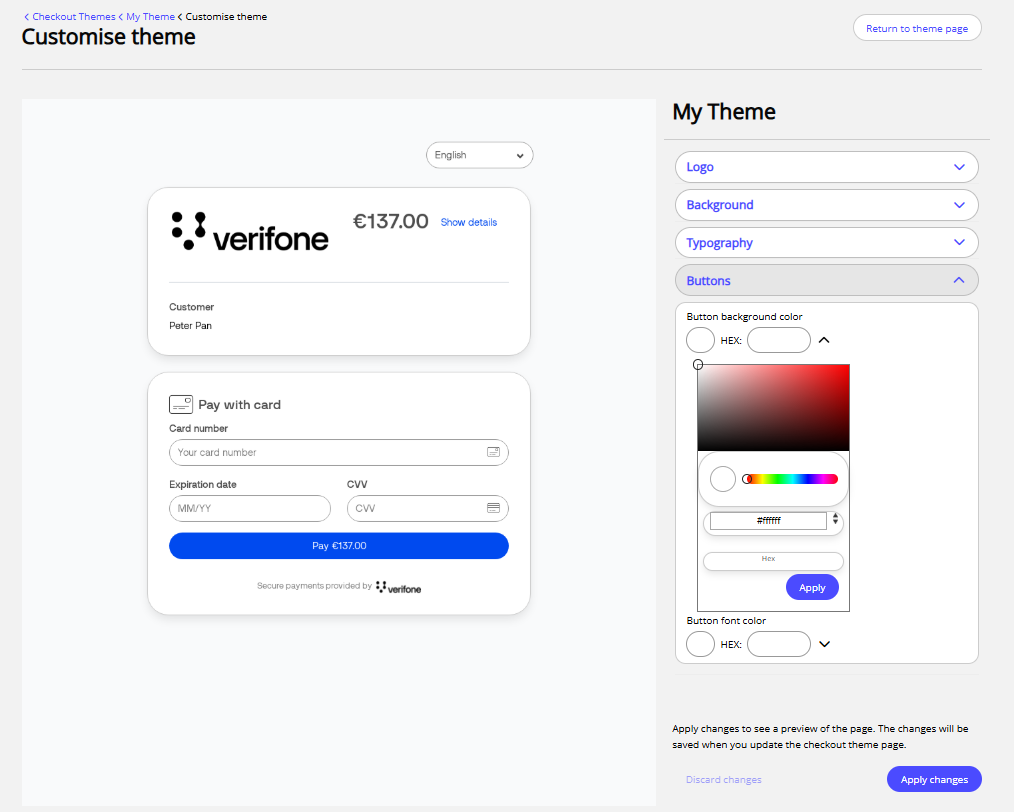
You can now customise your Checkout page by adding a logo, background colours, typography, and button colours.
Image files must be 500kb or less and in PNG or JPG format.
-
Logo
-
Background colour
-
Typography selector
-
Button colours
-
Click Apply changes.
-
Return to theme page and select Set as Default, then Save theme to apply the theme to the Checkout page by default.
If the theme is not set as default, it can be applied to the Checkout page by providing the
theme_idin the request body of the Checkout API or in the Link settings of the Pay by Link page.
The theme will be applied to Checkout and Pay by Link pages.