
WooCommerce integration setup
Configure the Verifone Hosted Cart plugin settings to accept payments on your WooCommerce store
Overview
After you have installed the Verifone Hosted Cart plugin in your WordPress site, you need to configure the plugin with your OnlinePay credentials. This guide provides instructions on how to configure the plugin to integrate with your OnlinePay account and start accepting payments on your WooCommerce store.
You can configure the plugin automatically using the WooCommerce setup wizard or manually by entering the required settings in the WooCommerce settings page.
Automatic setup using the WooCommerce setup wizard
The WooCommerce setup wizard guides you through the process of setting up your WooCommerce store, including configuring the Verifone Hosted Cart plugin. The wizard will prompt you to enter the required settings to connect your WooCommerce store to your OnlinePay account.
-
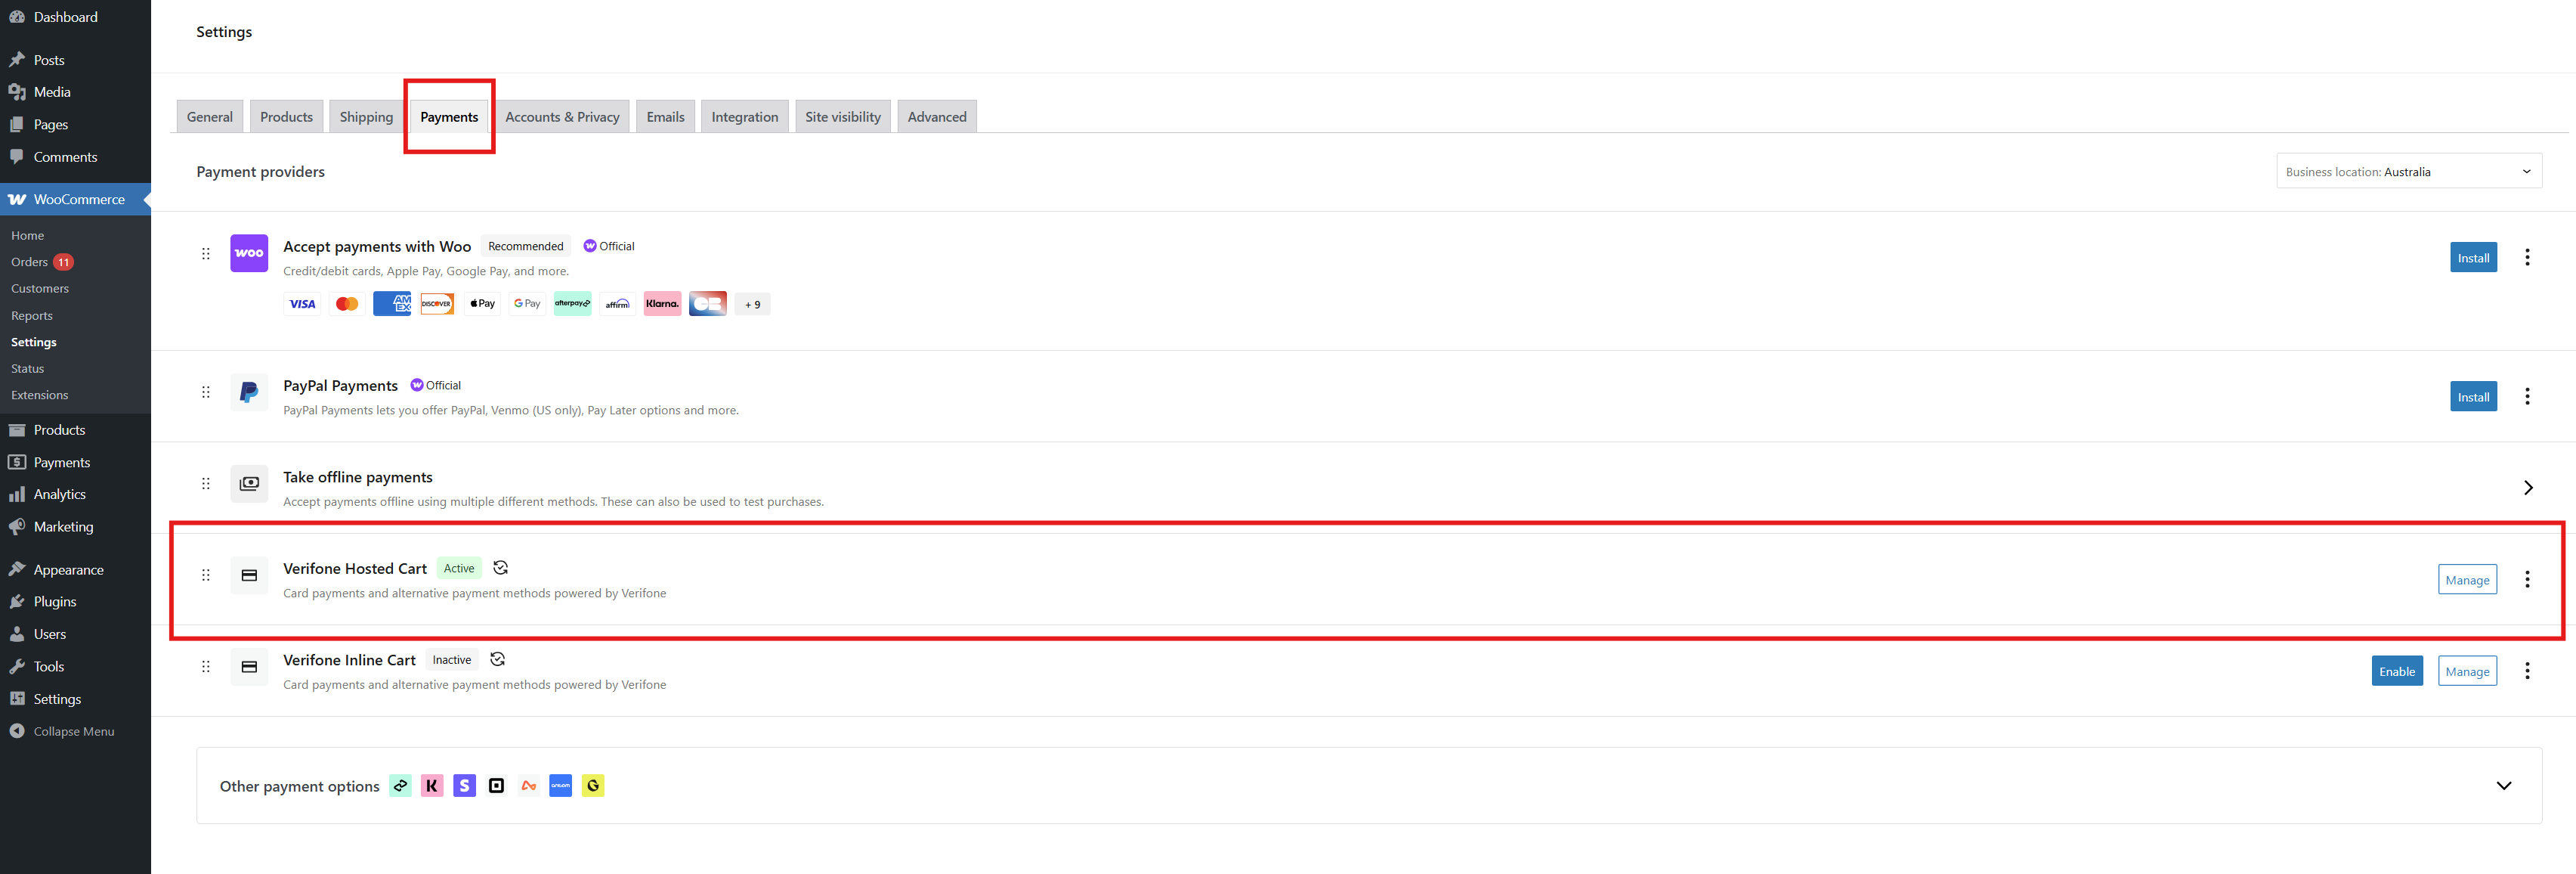
In your WordPress admin dashboard, navigate to WooCommerce > Settings, then click the Payments tab.
-
Locate the Verifone Hosted Cart payment method plugin and click Manage.
-
Click Auto setup under Verifone account settings to start the WooCommerce setup wizard.
-
In the Auto Setup Tool wizard, select Production mode to connect to your OnlinePay production account.
-
Provide your OnlinePay
User IdandAPI Keyin the respective fields. You can find out more about where to obtain these credentials in Authentication and environment variables.The Merchant Supervisor role is required to create and manage API keys for plugins.
-
In the Region drop-down list, select
AU (Australia).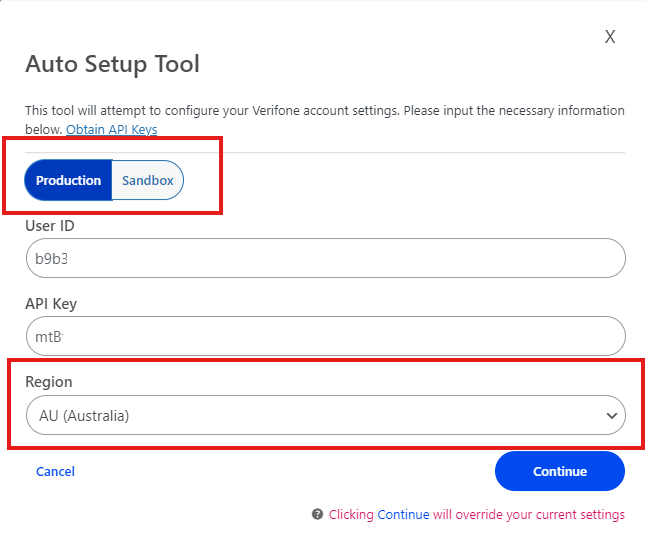
If you have an OnlinePay sandbox account and would like to use it for testing the plugin, select Sandbox and provide your sandbox API Key and User ID.
- Click Continue to complete the setup process.
Manual setup using the WooCommerce settings page
If automatic setup fails, or you prefer to configure the plugin manually, you can enter the required settings in the WooCommerce settings page.
-
In your WordPress admin dashboard, navigate to WooCommerce > Settings, then click the Payments tab.
-
Locate the Verifone Hosted Cart payment method plugin and click Manage.
-
Provide your OnlinePay
User Id,API Key, andOrganisation IDin the respective fields. You can find out more about where to obtain these credentials in Get started with the OnlinePay API.The Merchant Supervisor role is required to create and manage API keys for plugins.
If you have an OnlinePay sandbox account and would like to use it for testing the plugin, select Enable test mode and provide your sandbox API Key and User ID.
-
In the Verifone account region drop-down list, select
AU (Australia). -
Click Save changes to apply the settings.
Card payment settings
Configure your card payment settings in the Verifone Hosted Cart plugin to accept card payments on your WooCommerce store. These settings include your Payment provider contract ID, which is required to process card payments, and your 3DS contract ID, which is required for 3D Secure transactions. These IDs can be obtained from your OnlinePay account. See Get started with the OnlinePay API for more information.
-
In your WordPress admin dashboard, open the Verifone Hosted Cart payment plugin under WooCommerce > Settings > Payments.
-
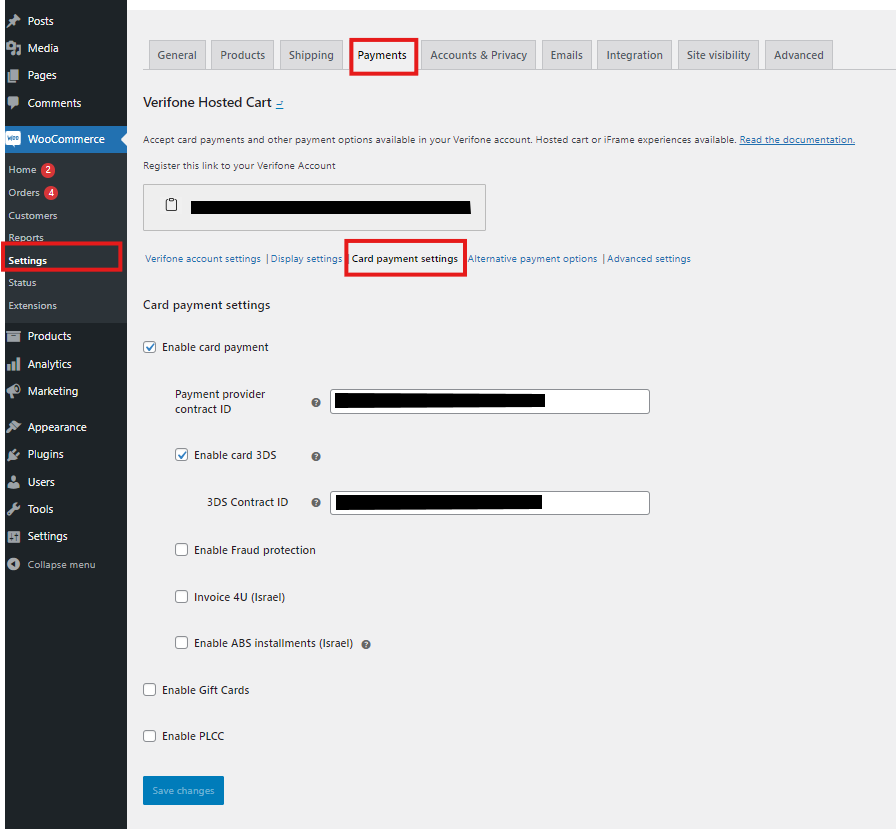
Click the Card payment settings tab.
-
Check the
Enable card paymentscheckbox to enable card payments on your WooCommerce store. -
Provide
Payment provider contract ID, obtained from your OnlinePay account. -
Check the
Enable card 3DScheckbox to enable 3D Secure card transactions, applying an additional layer of security to card payments. -
Provide
3DS Contract ID, obtained from your OnlinePay account. -
The remaining settings are not applicable to OnlinePay users and can be left as default.
-
Click Save changes to apply the settings.
Updated 6 months ago